2026-06-06
A raspberry pi segment display setup transforms raw data into readable visual output using 7-segment or 14-segment modules controlled by the Raspberry Pi’s GPIO pins. This guide provides expert insights on wiring diagrams, driver libraries, and code implementation to ensure reliable performance. Whether for a retro clock or industrial counter, mastering this interface allows developers to create low-power, high-visibility displays without complex HDMI dependencies.
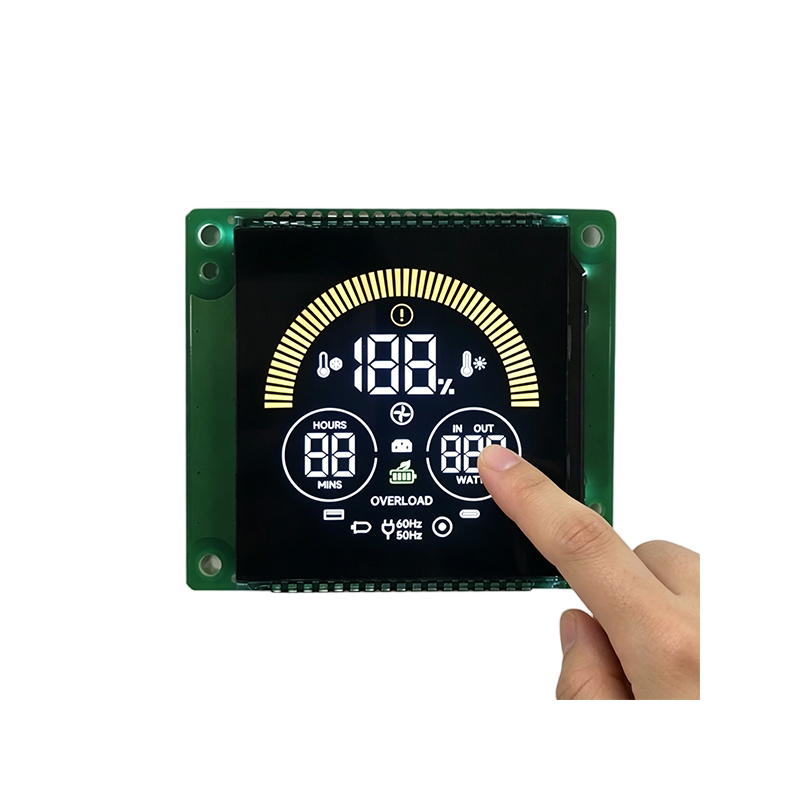
A raspberry pi segment display refers to an electronic visual interface connected to a Raspberry Pi single-board computer. These displays typically utilize Light Emitting Diodes (LEDs) arranged in specific patterns to form numerals and limited characters. The most common configuration is the 7-segment display, capable of showing digits 0 through 9.
More advanced variants include 14-segment and 16-segment displays, which offer improved alphanumeric capabilities. Unlike LCD or OLED screens, segment displays excel in high-brightness environments and consume significantly less power when showing static information.
The integration involves connecting the physical segments to the Pi’s General Purpose Input/Output (GPIO) header. This requires careful management of voltage levels and current limiting to prevent hardware damage. Proper configuration ensures the Pi can toggle individual segments rapidly to create the illusion of stable numbers.
Selecting the right hardware is critical for project success. The market offers several distinct types, each with unique wiring requirements and use cases. Understanding these differences prevents compatibility issues during the prototyping phase.
Industry professionals often recommend smart driver modules for beginners. They offload the intensive task of refresh rate management from the main processor. This results in cleaner code and more stable system performance overall.
Successful implementation begins with a solid understanding of the electrical characteristics. The Raspberry Pi operates at 3.3V logic levels, while many segment displays are designed for 5V systems. Direct connection without protection can degrade the Pi’s GPIO pins over time.
Current limiting resistors are mandatory. Each segment acts as an LED with a specific forward voltage drop. Without resistors, excessive current flows, potentially destroying the display or the Pi. Typical values range from 220 ohms to 470 ohms depending on the desired brightness.
For multi-digit displays, direct wiring consumes too many pins. A single 4-digit display might require 12 pins individually. Multiplexing techniques or shift registers become essential to expand capability without exhausting the 40-pin header.
Gathering the correct components ensures a smooth assembly process. Sourcing high-quality parts reduces the risk of intermittent connections and signal noise.
Experts advise using pre-made breakout boards for the first attempt. These modules often include necessary resistors and drivers onboard. This approach minimizes wiring errors and allows the developer to focus on software logic immediately.
Setting up a raspberry pi segment display involves both physical wiring and software configuration. Following a structured approach reduces troubleshooting time. This section details the process for a standard 4-digit module using a popular serial driver.
The following steps assume the use of a TM1637-based display, which is widely supported in the community. This protocol uses only two GPIO pins for data and clock, making it highly efficient for projects with limited pin availability.
Proper wiring is the foundation of a functional system. Incorrect polarity can prevent the display from lighting up or cause erratic behavior. Always double-check connections against the module’s pinout diagram before applying power.
Secure connections are vital. Loose wires on a breadboard can cause flickering digits. For permanent installations, soldering headers or using screw terminals provides superior reliability against vibration and movement.
Once wired, the software environment must be prepared. The Raspberry Pi OS usually comes with Python pre-installed, which is the preferred language for these projects due to its extensive library support.
Updating the system packages ensures compatibility with the latest drivers. Open the terminal and run the standard update commands to refresh the package list and upgrade existing software components.
Installing the specific control library is the next critical step. For TM1637 modules, the tm1637 Python package is the industry standard. It abstracts the low-level timing requirements, allowing users to send numbers with simple function calls.
Use the pip package manager to install the library globally or within a virtual environment. Virtual environments are recommended for production projects to isolate dependencies and prevent conflicts with other system scripts.
Creating the Python script brings the hardware to life. The code initializes the display object, sets the brightness, and renders the desired content. Error handling should be included to manage potential GPIO access issues.
The script begins by importing the necessary libraries and defining the pin assignments. Consistency between the code definitions and physical wiring is crucial. A mismatch here is the most common cause of “no display” issues.
After initialization, the script can enter a loop to update the display dynamically. This is useful for clocks, counters, or sensor readouts. The refresh rate should be managed carefully to avoid excessive CPU usage.
import tm1637
import time
from datetime import datetime

# Define pins
CLK = 23
DIO = 24

# Initialize display
display = tm1637.TM1637(clk=CLK, dio=DIO)

# Set brightness (0-7)
display.brightness(3)

# Show static number
display.show([1, 2, 3, 4])

# Infinite loop for clock
while True:
    now = datetime.now()
    hour = now.hour
    minute = now.minute
    display.number(hour * 100 + minute)
    time.sleep(1)
This basic example demonstrates core functionality. Advanced users can add features like colon blinking, decimal points, or scrolling text animations. The library documentation provides extensive methods for customizing character rendering.
While basic libraries suffice for simple tasks, complex applications require deeper control. Understanding the underlying mechanisms allows for optimization and custom effects not possible with standard wrappers.
Multiplexing is a technique where digits are lit one by one in rapid succession. Due to persistence of vision, the human eye perceives them as simultaneously lit. This reduces the pin count significantly but requires precise timing in the code.
Direct GPIO manipulation offers the highest performance but increases code complexity. By accessing the memory-mapped registers directly, developers can achieve faster toggle speeds than standard Python libraries allow. This is essential for high-speed counting applications.
Brightness control is not just aesthetic; it impacts power draw and component longevity. Running LEDs at maximum intensity generates heat and shortens their lifespan. Dynamic brightness adjustment based on ambient light is a professional feature.
Industry standards suggest operating LEDs at 60-70% of their maximum rated current for optimal balance between visibility and durability. This practice significantly extends the operational life of the display module.
Even experienced developers encounter hurdles. Systematic troubleshooting isolates variables to identify the root cause quickly. Most issues stem from power instability, wiring errors, or permission conflicts.
If the display remains dark, check the power supply first. The Pi’s USB port may not provide sufficient current for bright displays. Using an external powered USB hub or a dedicated 5V rail often resolves dimming or flickering problems.
Ghosting, where faint numbers appear on unlit digits, indicates timing issues in multiplexed setups. Adjusting the delay between digit switches or adding small capacitors across the power lines can stabilize the signal.
Permission errors when running Python scripts are common. GPIO access requires root privileges or membership in the gpio group. Ensuring the user account has the correct permissions prevents runtime exceptions.
Choosing the right control method depends on project constraints. Developers must balance ease of use, pin availability, and processing overhead. The following table compares the primary approaches available for Raspberry Pi projects.
| Method | GPIO Pins Required | Code Complexity | CPU Usage | Best Use Case |
|---|---|---|---|---|
| Direct GPIO | High (8+ per digit) | Medium | Low | Single digit, simple indicators |
| Multiplexing | Medium (Segments + Digit selects) | High | Medium | Multi-digit without extra chips |
| Shift Register (74HC595) | Low (3 pins) | Medium | Low | Expanding many outputs cheaply |
| I2C/SPI Driver (TM1637/MAX7219) | Very Low (2-4 pins) | Low | Very Low | Complex displays, multi-digit clocks |
The table highlights that driver chips like the TM1637 offer the best balance for most users. They minimize pin usage and offload processing tasks. Direct GPIO is rarely recommended for multi-digit setups due to the sheer number of pins required.
Shift registers provide a cost-effective middle ground for custom arrays. However, they still require the Pi to manage the shifting sequence. Dedicated driver ICs handle internal memory and refresh logic autonomously.
The versatility of the raspberry pi segment display enables diverse applications across hobbyist and industrial sectors. Their readability and simplicity make them ideal for situations where full graphical screens are unnecessary or impractical.
In home automation, these displays serve as elegant status monitors. They can show temperature, humidity, or server uptime without the glare of an LCD. Their retro aesthetic also appeals to enthusiasts building vintage-style gadgets.
Industrial environments benefit from their robustness. Segment displays remain visible in direct sunlight and extreme temperatures where LCDs might fail. They are commonly used for machine counters, timer displays, and error code indicators.
Integrating segment displays into smart homes adds a tangible interface to digital data. Unlike smartphone apps, a physical display provides glanceable information. This is particularly useful in kitchens or workshops where hands may be dirty.
These projects often combine the Pi with sensors like DHT11 or APIs fetching web data. The segment display acts as the final output layer, presenting processed information in a clean, analog-digital hybrid format.
Educational kits frequently use segment displays to teach binary counting and electronics fundamentals. Students learn how binary codes translate to visual outputs, reinforcing theoretical knowledge with practical experimentation.
In manufacturing, simple counters track production rates. A Raspberry Pi connected to a sensor can increment a segment display every time a product passes a checkpoint. This provides immediate feedback to operators without needing a full SCADA system.
Reliability is key in these settings. The simplicity of the hardware means fewer points of failure compared to complex touchscreens. Maintenance involves basic cleaning and occasional resistor checks rather than software reboots.
While DIY enthusiasts often prototype with generic modules, scaling projects for commercial or industrial deployment requires partnering with established manufacturers. Companies like Dalian Eastern Display Co., Ltd. bridge the gap between conceptual prototypes and mass-produced, reliable display solutions.
With two specialized factories located in Dalian and Dongguan, the company leverages professional production equipment and advanced industrial technology to manufacture a comprehensive range of monochrome LCD screens and modules. Their expertise extends beyond standard components; they are particularly committed to providing customized LCD screens and modules tailored to specific customer needs.
To date, they have successfully designed and produced over 10,000 unique products, including segment code displays, character dot matrix, graphic dot matrix LCDs, and TFT displays. These components are widely deployed in critical fields such as home appliances, automotive electronics, medical equipment, and industrial instrumentation, serving as a qualified supplier for many well-known global manufacturers.
For developers looking to transition from a Raspberry Pi prototype to a finished product, the company’s capacity is significant, boasting an annual design and production capability of 50,000 square meters of LCD screens and 10 million LCD display modules. Whether requiring OEM (Original Equipment Manufacturer) or ODM (Original Design Manufacturer) services, their infrastructure supports the rigorous demands of large-scale deployment while maintaining the precision required for specialized applications.
Maximizing the efficiency of a raspberry pi segment display project ensures long-term stability. Optimization covers both software algorithms and hardware configurations. Neglecting these aspects can lead to sluggish updates or hardware stress.
Code efficiency is paramount when running alongside other services. Blocking loops in Python can freeze the entire script. Utilizing non-blocking timers or threading allows the display to update while the Pi performs other tasks like network communication.
Hardware debouncing is another consideration if buttons are used to interact with the display. Mechanical switches bounce, causing multiple register events. Software debouncing routines or hardware capacitors ensure clean input signals.
Flicker occurs when the refresh rate drops below the human perception threshold, typically around 60Hz. In multiplexed displays, this is a common issue if the code execution is too slow between digit switches.
To mitigate this, prioritize display update routines in the code structure. Keeping the logic inside the refresh loop minimal ensures consistent timing. Avoid heavy computations or network requests within the display rendering cycle.
Using C extensions or compiled libraries for time-critical sections can drastically improve performance. While Python is excellent for logic, lower-level languages handle precise timing with greater accuracy on the Raspberry Pi platform.
Addressing common queries helps clarify uncertainties for developers at all levels. These answers reflect current best practices and technical realities of working with segment displays on the Raspberry Pi.
It depends on the current draw. The Pi’s 5V pins can supply limited amperage shared with USB ports. For small modules, direct connection works. For larger, brighter displays, an external 5V power supply with a common ground is strongly recommended to prevent brownouts.
This usually indicates a mismatch in the segment mapping order within the code. Different manufacturers wire segments (A-G) differently. You may need to adjust the bit-order configuration in your library settings or rotate the data byte before sending it.
Yes, but with limitations. Characters like A, b, C, d, E, F, H, L, O, P, S, U, and Y are recognizable. Lowercase letters often look like uppercase counterparts. For extensive text, a 14-segment or dot-matrix display is a better choice.
Daisy-chaining is the most efficient method if using driver chips like MAX7219. These chips support cascading, allowing multiple units to be controlled via the same data line. Alternatively, use an I2C expander chip to manage separate data lines efficiently.
For direct GPIO connections, keep wires under 30cm to avoid signal degradation and noise. When using differential drivers or shielded cables with serial protocols like I2C or SPI, lengths can extend to several meters, though signal integrity testing is advised.
The landscape of embedded displays is evolving, yet segment technology remains relevant. Its niche lies in low-power, high-legibility applications where graphical richness is secondary to clarity. The integration with AI and IoT continues to open new possibilities.
Future developments may see smarter driver chips with built-in wireless capabilities. This would allow the Raspberry Pi to send data over Wi-Fi to a remote segment display node, decoupling the processor from the physical interface entirely.
Sustainability is also driving design choices. Segment displays inherently consume less power than full-color screens. As energy efficiency becomes a global priority, their role in green computing initiatives is likely to expand in public signage and monitoring systems.
Mastering the raspberry pi segment display opens a gateway to creating tangible, interactive projects. From simple clocks to complex industrial monitors, the combination of flexible software and robust hardware offers endless potential. Success relies on selecting the right driver, respecting electrical limits, and optimizing code for smooth operation.
This technology is ideally suited for makers, educators, and engineers needing reliable visual feedback without the overhead of graphical operating systems. If you are starting a new project, begin with a pre-built driver module to validate your concept quickly.
Ready to build? Start by sourcing a compatible TM1637 module and experimenting with the provided Python examples. Gradually progress to custom wiring and multiplexing as your confidence grows. The journey from blinking an LED to building a full information dashboard is a rewarding path in embedded development.